Mac Harddisk Upgrade Usability Improvements
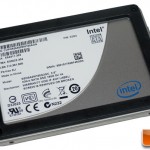
Blogging for the first time in a long time from my wife’s computer, because I’m installing my brand new Intel SSD hard drive in my macbook.
Oddly enough I ran into a few things during the install process that I think Apple could improve in their interface. (using Snow Leopard)
Apple should recognize a new unformatted disk inserted and show an install guide
I took out the old disk, inserted the new one, and booted the machine. After 1-2 minutes of nothing, a big folder with a questionmark appeared in the middle of the screen — blinking. No helpful text (no text at all). Just one big blinking questionmark on top of a folder.
Several things could have helped me here.
- Show a helpful message that boot disk is not found (it may have crashed or have been replaced)
- Show a note that to select a boot menu, restart the computer while pressing and holding the ‘C’ key.
- Detect that a new harddisk (other than the one used on last successful boot) is inserted, and show a message helpful for explaining harddisk upgrade steps.
- Tell me that I need to insert the Mac OS X disk in order to restore the system, restore backups, or install.
- After loading the Mac OS install menu from the Mac OS X disk, there is one big primary action: Install new OS on this computer. I rushed and pressed, but should have looked for the secondary options in the dropdown menus. An easy improvement is to add smaller, visually less dominant, but visible secondary options (“format new hard drive”, “restore system from backup”).
Many of these points are pretty obvious when i write it now, but I know each one of them could have saved me brain cycles and time in the harddisk swap process.
I wasted 2 hours of valuable time here. Because of the missing help on screens, first I put the old hard drive back in. Then I put the SSD drive in a usb-dockingstation to investigate it with Disk Utility. Then I called Thomas to learn that I had to press ‘C’ at startup to force a boot menu. Furthermore I was too quick and pressed “Install new system”, before I found the dropdown menu and saw the menu item I should have taken: “Restore the system from backup”
By the way, It took roughly 3 hours to read 120GB from the TimeCapsule and everything was back up and running. Hooray for TimeCapsule.
- njr 3.0: Restoring a hard drive from Time Machine
- James Duncan Davidson: Restoring from Time Machine
- Legit Storage Reviews: Intel X25-M 160GB 34nm MLC G2 SSD Benchmark Review


February 5th, 2010 at 10:25 (GMT-1)
Here’s a idea, when mac parts/products are sent they should also include a guide explaining and what to do to install the new part.